We are living in a challenging time for the small scale brewer. Raw material and energy costs are at an all time high, yet our customers has less disposable income. To maintain your margin without sacrificing quality one, excellent method is to max out the capacity of your brewery. This article is aimed at small brewers, not those with vessels to hold their last runnings to use as the start of the next sparge and the like.
Which vessel is going to limit you?
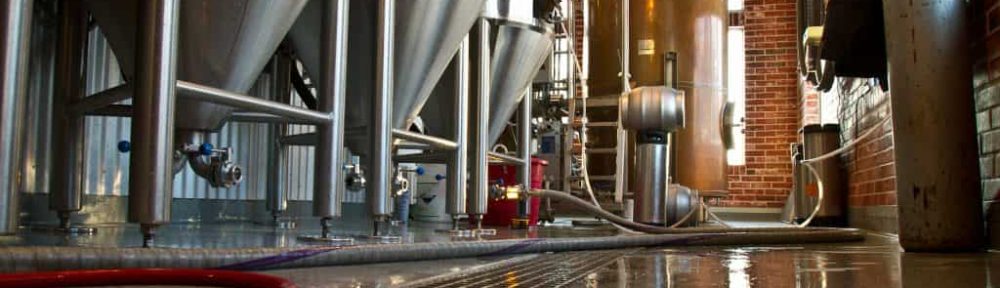
This is the first question you need to ask – which of your vessels is going to limit your output? Assuming you brewery equipment was bought at the same time, it is unlikely that your mash tun will be your limiting factor. This is likely to have been designed to brew ABV’s higher than your core range beers. So you need to know the volume and thus working capacity of your copper and your fermenters.
It is easy to estimate the volume of these vessels. Most coppers are cylindrical and thus the total volume is easily calculated.
Volume of a Cylinder = Π . r2 . h
The volume of flat bottomed fermenters can be calculated the same way, but if you are lucky enough to have cylindroconical fermenters you need also to calculate the volume of the cone at the base and add this to the volume of the cylindrical section.
Volume of a conical section = Π . r2 . ⅓H
But of course there is a difference between the total volume and the ‘working’ or useable volume. For a copper this is 80% of the total volume. For a fermenter it will be in the range 80-90% depending on variety of factors.
How to maximise the capacity of your copper
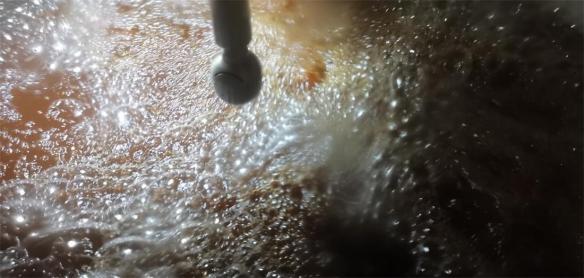
There are two options here. If you don’t want to alter your recipe then to maximise the volume that your copper can safely boil you can reduce the foaming that occurs at the start of the boil. As the proteins from the malt denature and drop out of solution they act as nucleation points for the bubbles of the boil and other proteins aid foam stability. This can lead to a deep head of foam during the first 10 minutes of the boil. There are commercial antifoaming agents which can be added at this stage of the boil, but you may not know that the natural product versions of these are actually a hop extract. So if you add around 5% of your hop bill just before the start of the boil (i.e. First Wort Hops) these will reduce foaming without you adding cost or anything artificial into you beer.
Another option would be to consider taking a small step towards high gravity brewing. You can aim for a pre-boil gravity 10-20% higher than your designed post boil gravity, knowing that you can liquor back at the end of the boil either directly post boil, or during the transfer.
How to maximise the capacity of your fermenter

Here again, foam management is key to maximising your capacity. Medium and larger scale breweries would normally fill their fermenters from the bottom to minimise foam formation. As well as increasing capacity it also aids head stability in the final beer. Think of the foam capacity of beer being a fixed value over the whole life of the beer, from manufacture to the customers glass – the more foam you form in the process, the less potential for foam (head) there is in the final beer. In bottom fill operations the wort is oxygenated in-line on the way to the fermenter. However in micro breweries oxygenation is often achieved by top filling the fermenter, allowing the splashing of the work to entrain oxygen and thus avoid the need to buy bottled oxygen.
If you top fill your fermenters to oxygenate the wort the volume of foam can be considerable and limit the capacity of the fermenter. Here an antifoam agent such as Murphys FD20PK or AB Vickers Foamsol can be added during the first 10% of the transfer to dramatically reduce the foam and thus increase your fermenter capacity. I was recently able to increase the fermented volume at a brew-pub client by 7% using this approach.
None of the concepts I have highlighted above require the purchase of any additional equipment. It is not uncommon for a brewery to increase it’s capacity by buying double sized fermenters and filling with two batches of wort each day, but this is likely to mean employing extra staff or paying overtime – so whilst it will increase your capacity, the impact on your margin will be minimal in comparison to the simple optimisation methods I’ve detailed above.
The best approach
When you have decided which process stage you want to focus upon, the best approach is to make a number of step wise changes towards what you have estimated as your maximal capacity. But remember that each increase will need to be in increments of cask volume (i.e. 42 litres for an extra Firkin or 21 litres for a Pin). Gaining an extra 3/4 of a cask does you no good at all!
If you would like help maximising the batch size of your microbrewery, then please give me a call. Similarly, if you would like someone to brew on your kit to cover times of peak output or to cover holidays (without having to employ an additional person full time) then this is another service I am pleased to offer.
