Patron’s Tap wins Beer of the Festival

Congratulation to George and the team at The Patron’s Tap in Blackburn on winning the Beer of the Festival at the Clitheroe Beer Festival 2024. George designed the beer, I did the scale up calculations and brewed the beer. They always have one of their own beers on tap, so if you are in Guide drop into this great little bar and taste one of their award winning ales.

If you want help brewing award winning ales and are in the North West of England, drop me a line...

Whisky Galore! Boosting the yield of wash production for a whisky client

PXL_20231208_141206513

A new whisky distillery has opened near to me, so I got in touch to see if they wanted anyone to help making their wash. The owner got back to me the next day to ask if I could help with issues with stuck mashes and slow fermentations.

What might not be obvious to anyone new to the field is that the precursor to whisky spirit is something very akin to beer, but without any hops. I always offer the first hour of consulting time free so I can decide if I can add value for the customer and they can get confidence in the knowledge which I offer. We were soon having a fruitful conversation and the reason for their slow / stuck fermentations became obvious after running a forced fermentation test – they had the wrong mix of sugars in their wort (or wash as it’s called in this industry). Could I help to resolve this? Could I optimise their yield to sugar in the wash and could I advise on best practice CIP methods? Yes, yes, yes!

The benefit of employing someone like me is that my Ph.D background allows me to get up to speed in a new topic in hours, not weeks. Understanding the subtle but important differences between wort and wash production made for fascinating reading. In beer production we choose the mash temperature to control the sweetness and body of the final beer, with whisky one is looking to maximise fermentable sugar extraction. To achieve this the grist is mashed at low temperature, almost all the strong worts are run off and then it is subject to a kind of pseudo step mash by sparging at 75 C to activate the α-amylase to convert areas of the starch which are sterically inaccessible to the β-amylase. But since non-fermentable sugars are of little value to the whisky maker, the wort is not boiled but (cooled and) transferred directly from the mash tun to the FV. Here speed of operation is key because the aim is to transfer active enzymes, including limit-dextrinase, into the FV. As the fermentation progresses these enzymes work on the complex sugars to form maltose which can then be converted to alcohol. Thus efficient operating practices will boost the yield to alcohol.

By observation it was clear that the HX (heat exchanger) which had been installed was far too small which was increasing processing times.

PXL_20240104_154525690

A new HX is now on order, but in the mean time it was important to get production running. Employing a trick to make Brut IPA I advised on an exogenous enzyme we could add to the FV to allow the fermentations to run to completion whilst the new HX is awaited. Roll on two weeks and all fermentations are now reaching their desired terminal gravity and I have given hands on help and coaching which has boosted the sugar extraction yield from 67 to 93% and I aim to increase this still further.

Now my role has moved on to training the guys who are going to be running the brewing side of the process, write some SOP’s (best practice training is always based on an SOP) and help embed consistency of operation and thus yield and flavour profile. It is really satisfying to use my process support skills from my time in the chemical industry in parallel with my technical understanding of the biochemistry of brewing to help yield good consistent spirit in good yield. I must confess to be rather enjoying myself.

Reducing cask ullage – a case study

When I work as a locum brewer I often get asked “whilst you are here can you also look at…” and have a technical conundrum placed in front of me. I love questions such as these, the following is just such an example.

A client was short of staff for three months and they called me in to cover part of their brewing schedule. It was somewhere I has worked before so the packaging team quizzed me about why they were hearing complaints from customers about higher than normal ullage in the casks of late. I looked at some of their routine finings tests and it was clear they were suffering from fluffy bottoms – not something anyone wants to hear!

So we held back a batch of finished beer for a few hours before any auxiliary finings were added and was able to find the optimal levels of auxiliary and isinglass finings by some simple test work.

The issue turned out to be the level of isinglass that was being charged, the auxiliary level having been proved as optimal via my test work. I then checked out this new finings level on two other beers to confirm and was delighted to see the beer drop bright in < 30 min and give a good dense body of flocs at the bottom of the sample glass. No more fluffy bottoms!

A simple update to their packaging procedure and now a few weeks down the line the customers of my client are happy once again and thus so are they. Such is the benefit of a well trained outside eye looking at your process.

The importance of pH control in brewing

All through the brewing process, having your mash liquor, wort and proto-beer within the desired pH window is critical to both quality and yield. When we are mashing or fermenting we are relying on enzymes which work best within a tight pH window. During boiling it is chemistry rather than biochemistry which is at play, but still pH is critical to the final beer quality.

The chart below shows the ideal pH window as it tracks through the whole brewing process.

Mashing

During the mash we want the α and β amylases to work as effectively as possible and that means that the mash should be between pH 5.2 and 5.4. This is controlled primarily by your water chemistry which I covered in an earlier post. If your pH is too low your starch conversion efficiency will drop, if it’s too high you’ll start to extract tannins and silicates which you want to leave behind in the spent grain. If you are running a new recipe it’s wise to check this pH on the first couple of runs to make sure it within range. This is doubly important with darker beers, where the roasted malts can have a big impact on the pH. There are ways to estimate this, but they are only estimates and it’s best to check what you’ve achieved and adjust your calcium or bicarb addition levels on porters and stouts. After that it’s good to check your run off pH once a week / fortnight to check nothing has drifted.

That astringency that you taste in some stouts, it shouldn’t be there! That is someone not properly attending to their mash pH.

Mashing is the stage where pH is most critical, if you get inside the correct window here then it should track within the desired window for the rest of the process for beers above 3.0% ABV.

Sparging

Here you should be using either pH or SG to monitor your last runnings so as not to go too far. That last portion of weak worts doesn’t contain a whole lot of sugar but will contain undesirable levels of polyphenols or lipids if you let the pH go above 5.8 or SG below 1.006. Remember you are sparging with water which will be pH 7 or slightly above, so the pH of the run off will start to rise from the middle of the sparge onwards

Boiling

There’s a lot that goes on in the boil. The pH will impact the colour development, hop α-acid isomerisation and protein drop out (thus final haze stability). Different pH’s are ideal for each, so the key here is consistency. The pH drops during the boil due to the acid end products of the Maillard reaction and more Ca phosphate precipitation. If necessary you can add a little phosphoric or lactic acid during the boil if the pH is outside of your normal range. However if you have got your mash pH correct and not over-sparged you shouldn’t have an issue. If you are making a low alcohol beer you are likely to need to add a little acid to drop the pH into range.

Fermentation

Again we are trying to keep the enzymes happy and so long as we’ve done everything right up to this point all should be well. Yeast produces acids as a by-product of cell growth and also as one of it’s sugar transport mechanisms. One key thing to remember is to drop the yeast, or transfer the beer off the yeast in a timely fashion or you’ll see your pH rise, reducing shelf life as well as adding undesired ‘beefy’ flavours to your beer. If you are making a low alcohol beer again extra care should be taken and the pH adjusted if necessary.

pH measurement

After spending 20 years in the chemical industry I know more than a little about temperamental pH meters. If you are going to buy a pH meter don’t skimp on price or pick the cheapest one you can find on Amazon. These will never be as accurate or repeatable as you’ll need for brewing. Something from Myron or a bench based model from Jenway would be good options. If you cannot spend £250 then your better option would be to get some narrow range pH test sticks (try these or these). These may not be as precise but if you want something inexpensive yet accurate they are your very best option. You can know for sure if you are sitting inside your desired range or when to stop your sparge. They are quick too.

How to perform a diacetyl test – and why you should.

What is diacetyl?

For yeast cells to grow they need nutrients, some for energy and some to build new cell material to enable multiplication. That which they cannot draw from the wort, the yeast needs to synthesise from simpler starting materials. During the synthesis of the amino acid valine, a by-product is diacetyl.

Diacetyl chem structure pic

The challenge with diacetyl is that it has a low taste threshold and it tastes of butterscotch, not a flavour we want in most beers.

How is diacetyl formed?

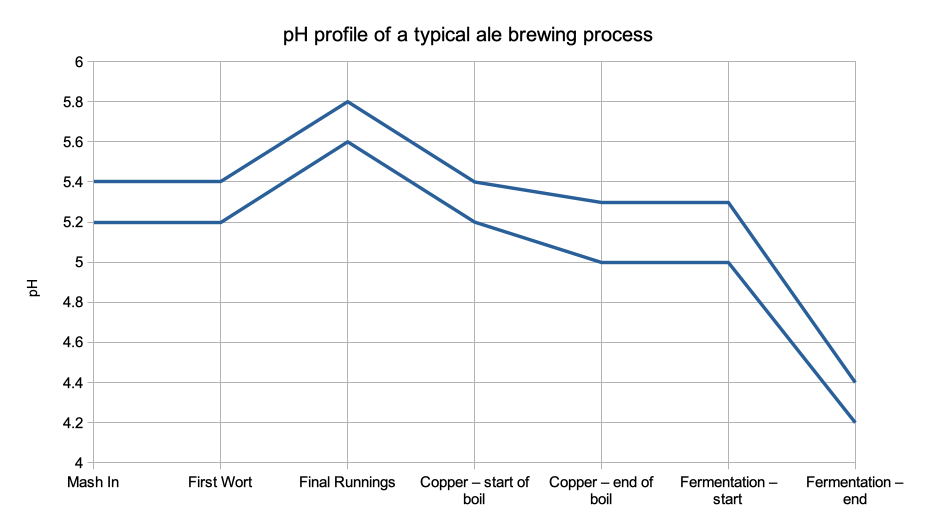
It is good to understand this, as it underpins how the diacetyl test works. As with most biochemical pathways, the formation of diacetyl is a multi-stage process. It is important to understand that up until the penultimate stage these steps are enzyme catalysed (i.e. fast) but the final step from α-acetolactate (AAL) to diacetyl is a simple but slow chemical reaction. With AAL being capable of being formed faster than it is consumed, a residual concentration can build up in the final stages of fermentation. This is especially true in lower temperature fermentations. Thus once your ale / lager has reached its terminal gravity it may not taste of diacetyl, but if AAL is present, it will be formed with time in the final package. Thankfully yeast also contains an enzyme which will reduce diacetyl to 2,3-butandiol which has a far higher taste threshold and this eliminates the off flavour issue. Thus the diacetyl rest, a period of warm conditioning at the end of fermentation, which allows the AAL to convert to diacetyl and under conditions where it can be consumed to form something essentially flavourless. Cool down the green beer and this enzyme cannot act.

So what is a diacetyl test and how to I perform it?

You could take a sample of your green beer and inject it into an HPLC and see if AAL is still present, but if you don’t have a spare £25k burning a hole in your pocket there is a far simpler and cheaper method:

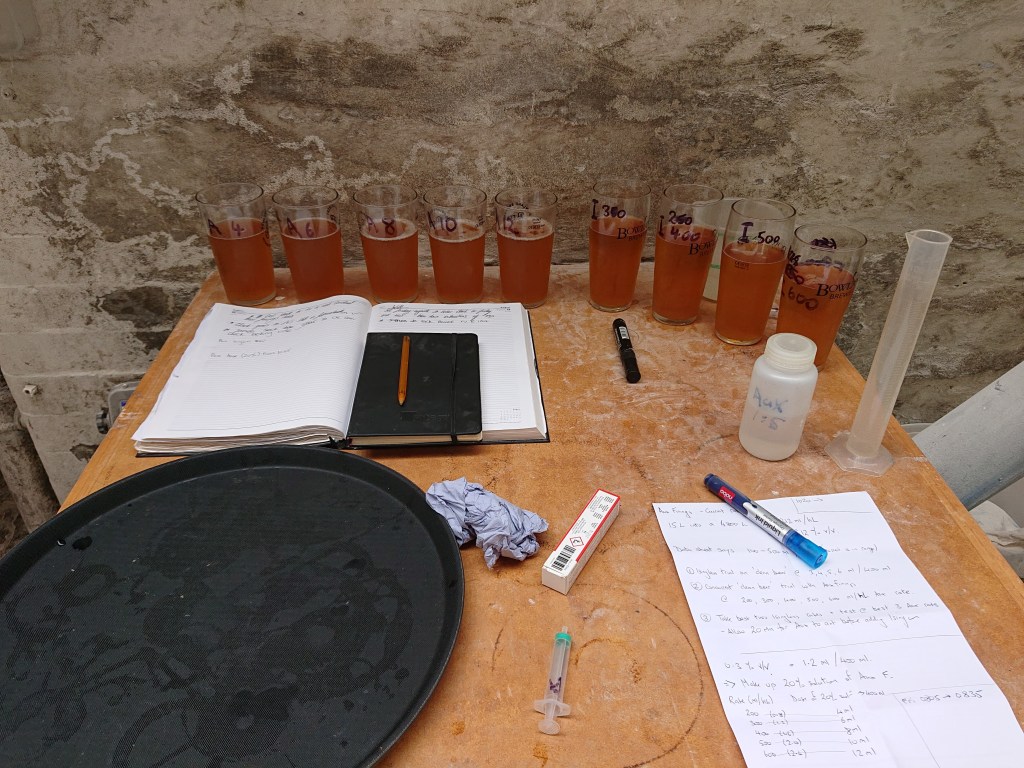
Take two samples of your green beer, 50 ml each is enough, into sealed bottles. Place one into the fridge (the control) and drop the other into a jug of hot water at 60-70 C, chances are you have some hot liquor to hand which would be ideal for this. Leave the sample in the hot water for 20 min then remove and cool. Then all you need to do is to taste both samples.

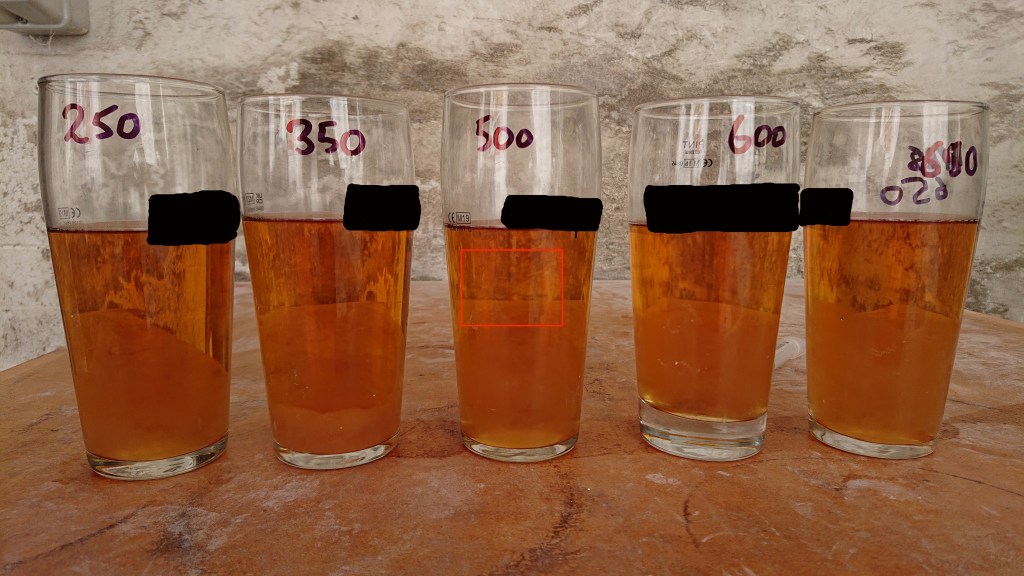
  • Can you taste butterscotch in the heated sample (having the control sample to compare against makes this assessment much easier) – If you can then you have some AAL still present in your green beer which will form diacetyl with time. The green beer needs longer to warm condition so hold at 16-20 C for another 24-48 hours and then run the test again.
  • There is no diacetyl taste to either sample – your beer is ready to chill and move forwards.

My experience

Residual AAL / diacetyl is present at the end of the primary fermentation of some recipes but not all. The key factors are the choice of yeast, malt bill and fermentation temperature. Some combinations will require a diacetyl rest, some will not. Some craft breweries are paranoid about diacetyl in their beer and warm condition all their batches, but unless you are making a lager, this is an unnecessary loss of brewery efficiency. When you are running a new recipe then run the test for the first three gyles. If the test comes out negative at the end of each primary fermentation then unless you change anything it always will. Carry out warm maturation only on the beers which need it. Beer design is, in part, an art but its manufacture is certainly a science.

If you find yourself with a beer design where AAL / diacetyl is present at the end of the primary fermentation you do have another option. That is to add an exogenous enzyme (AAL decarboxylase / ALDC ) into your FV at the start of fermentation to guarantee that all the AAL will be quickly reduced to acetoin and no diacetyl will ever be formed.

Would you like help with the consistency of your beer quality? If so give me a call and we could arrange a phone / video consultation or if you are local I could come out and help you in person.