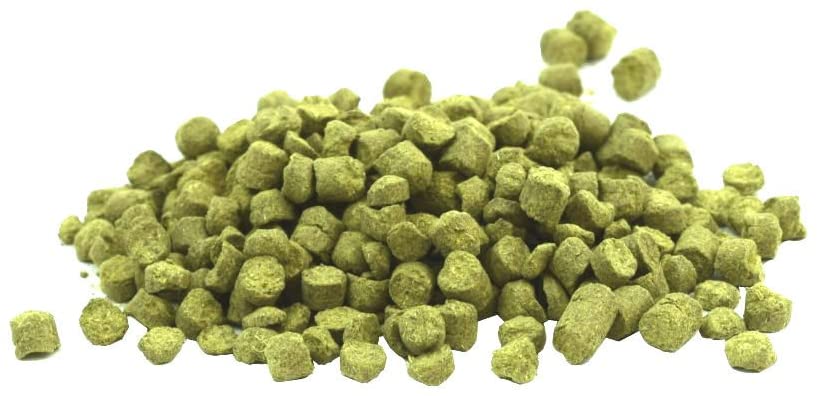
All hops degrade with time, especially if in contact with air. The HSI (Hop Stability Index) is a measure of the rate of oxidation of the alpha and beta acids with time. The value quoted relates to the extent of oxidation of these bittering acids when in the presence of air at 20 °C over a period of six months.
Why is this important?
Whilst the bittering potential of an open package of a high HSI hop will reduce significantly over time, it is not the economics which matter most to a brewer who only only brews infrequently or at a small scale. The issue which should concern you is a change in the nature of the bitterness which is imparted. As the bittering acids oxidise their flavour changes, and rather than the typical neutral bitterness you want, you are likely to get a vegetal like bitterness; like that you would get with overcooked cabbage or sprouts. This is not pleasant.
How do I avoid this problem?
All the time your hop pellets are in sealed, oxygen free, bags they cannot oxidise. It is open bags, which are now in contact with oxygen where you will have a problem. For more information, see this article. It is good practice to chill all of your hops, but this is even more important once the bag has been opened. If you want to store an open bag of hop pellets for more that a few weeks you are best advised to seal the bag as best you can and keep in a freezer. Larger breweries will use whole bags of pellets / whole tins of extract either within a batch, or within the week and this overcomes the issue, but for smaller producers, like brew pubs, or new smaller businesses this is not going to be an option.
The easiest and most practical option to manage hop acid oxidation is to choose your hop varieties carefully. Look up the characteristics of several hop varieties which give you the properties / flavour profile you are looking for, and choose only hops where the HSI is < 30%. To exemplify this consider Columbus, this is a very high alpha acid hop, seemingly ideal as a bittering hop. However the HSI is 45% and thus is not a variety I’d recommend to smaller breweries who will not use a whole bag within a fortnight. Similarly Centennial is a sublime aroma hop for lovely, well retained citrus / grapefruit flavours (see my article concerning hops whose flavour with the best retention into the final beer) but again it has a high HSI and will start to give you unpleasant flavours if the bag has been open for more than 2-3 weeks.
Good hop choices
Fortunately we are now blessed with such a broad range of hop varieties that, with access to the right knowledge one can choose a hop which has the flavours you want and is practical for your scale of operation. Here are some examples to get you started…
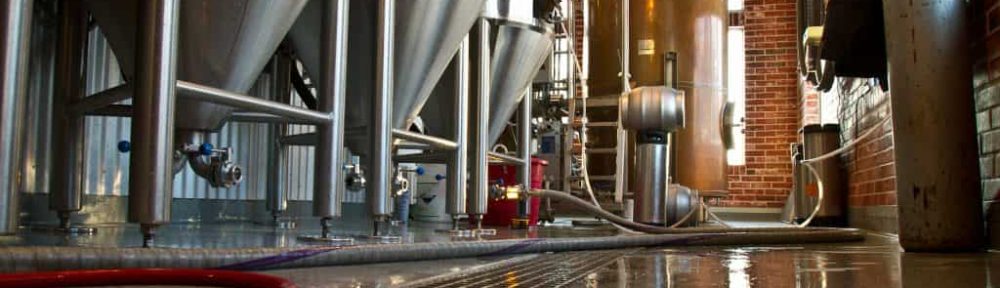
We are living in a challenging time for the small scale brewer. Raw material and energy costs are at an all time high, yet our customers has less disposable income. To maintain your margin without sacrificing quality one, excellent method is to max out the capacity of your brewery. This article is aimed at small brewers, not those with vessels to hold their last runnings to use as the start of the next sparge and the like.
Which vessel is going to limit you?
This is the first question you need to ask – which of your vessels is going to limit your output? Assuming you brewery equipment was bought at the same time, it is unlikely that your mash tun will be your limiting factor. This is likely to have been designed to brew ABV’s higher than your core range beers. So you need to know the volume and thus working capacity of your copper and your fermenters.
It is easy to estimate the volume of these vessels. Most coppers are cylindrical and thus the total volume is easily calculated.
Volume of a Cylinder = Π . r2 . h
The volume of flat bottomed fermenters can be calculated the same way, but if you are lucky enough to have cylindroconical fermenters you need also to calculate the volume of the cone at the base and add this to the volume of the cylindrical section.
Volume of a conical section = Π . r2 . ⅓H
But of course there is a difference between the total volume and the ‘working’ or useable volume. For a copper this is 80% of the total volume. For a fermenter it will be in the range 80-90% depending on variety of factors.
How to maximise the capacity of your copper
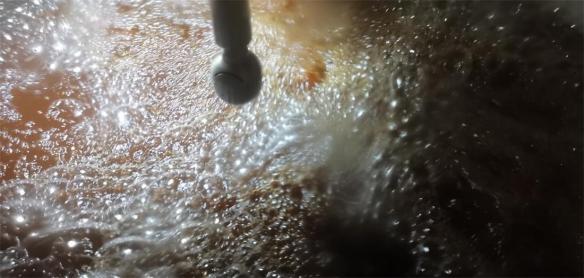
There are two options here. If you don’t want to alter your recipe then to maximise the volume that your copper can safely boil you can reduce the foaming that occurs at the start of the boil. As the proteins from the malt denature and drop out of solution they act as nucleation points for the bubbles of the boil and other proteins aid foam stability. This can lead to a deep head of foam during the first 10 minutes of the boil. There are commercial antifoaming agents which can be added at this stage of the boil, but you may not know that the natural product versions of these are actually a hop extract. So if you add around 5% of your hop bill just before the start of the boil (i.e. First Wort Hops) these will reduce foaming without you adding cost or anything artificial into you beer.
Another option would be to consider taking a small step towards high gravity brewing. You can aim for a pre-boil gravity 10-20% higher than your designed post boil gravity, knowing that you can liquor back at the end of the boil either directly post boil, or during the transfer.
How to maximise the capacity of your fermenter
Here again, foam management is key to maximising your capacity. Medium and larger scale breweries would normally fill their fermenters from the bottom to minimise foam formation. As well as increasing capacity it also aids head stability in the final beer. Think of the foam capacity of beer being a fixed value over the whole life of the beer, from manufacture to the customers glass – the more foam you form in the process, the less potential for foam (head) there is in the final beer. In bottom fill operations the wort is oxygenated in-line on the way to the fermenter. However in micro breweries oxygenation is often achieved by top filling the fermenter, allowing the splashing of the work to entrain oxygen and thus avoid the need to buy bottled oxygen.
If you top fill your fermenters to oxygenate the wort the volume of foam can be considerable and limit the capacity of the fermenter. Here an antifoam agent such as Murphys FD20PK or AB Vickers Foamsol can be added during the first 10% of the transfer to dramatically reduce the foam and thus increase your fermenter capacity. I was recently able to increase the fermented volume at a brew-pub client by 7% using this approach.
None of the concepts I have highlighted above require the purchase of any additional equipment. It is not uncommon for a brewery to increase it’s capacity by buying double sized fermenters and filling with two batches of wort each day, but this is likely to mean employing extra staff or paying overtime – so whilst it will increase your capacity, the impact on your margin will be minimal in comparison to the simple optimisation methods I’ve detailed above.
The best approach
When you have decided which process stage you want to focus upon, the best approach is to make a number of step wise changes towards what you have estimated as your maximal capacity. But remember that each increase will need to be in increments of cask volume (i.e. 42 litres for an extra Firkin or 21 litres for a Pin). Gaining an extra 3/4 of a cask does you no good at all!
If you would like help maximising the batch size of your microbrewery, then please give me a call. Similarly, if you would like someone to brew on your kit to cover times of peak output or to cover holidays (without having to employ an additional person full time) then this is another service I am pleased to offer.
Well deserved recognition for John at the Bird Inth Hand, Darwen
Sadly John nipped out before I could get a picture with him and his CAMRA award for the best Craft Beer Bar in Blackburn and Darwen. I’m delighted for him and proud to say that all of his house beers (4 so far) have been designed and co-brewed by myself on his brew kit installed in the cellar of the bar. My trousers show evidence of a busy brew day making the next batch of the popular Step 1, a NZ hopped pale ale.
I still remember the advice given to me by my first head brewer. “The two most important aspects of brewing” he said, “are cleanliness and temperature control.”
There are three classes of soiling you need to deal with in a brewery:
Organic soiling– that could be burnt on carbohydrates / proteins on the hot side and yeast residues in your fermenter
Inorganic soiling – this would be mostly scale (calcium / magnesium oxide) or calcium oxalate.
Biofilms – these tend to form in places where liquor can lie and which don’t see turbulent flow. Under the plates in the mash tun and in wort transfer lines for example.
Organic soiling
The most frequent / routine soiling you’ll be dealing with is organic soiling in the copper and your fermenters. You want to free this off of the vessel walls and then ensure it remains suspended until you can flush it out. The best cleaning agent for organic soils is specially formulated caustic (NaOH) solution. Brewery caustic formulations come with surface active agents in them to improve wetting, sequest metal ions and keen non water soluble soils suspended.
Your CIP caustic solution should be 1-3% NaOH (normally the concentrate is 30% NaOH). Take care with the concentrate and follow your local risk assessment. Googles and gloves are required and always add caustic to water, not water to caustic to avoid it overheating and spitting.
If you are a micro brewery you will not use huge volumes of caustic and it’s worth being aware that you can usually buy something suitable from your local agricultural merchants as it is also used to clean dairy milk tanks. Take care though as dairies tend to prefer formulations that also contain hypochlorite. Evans Vanodine CIP liquid would be a good choice because it contains no chlorine based chemicals.
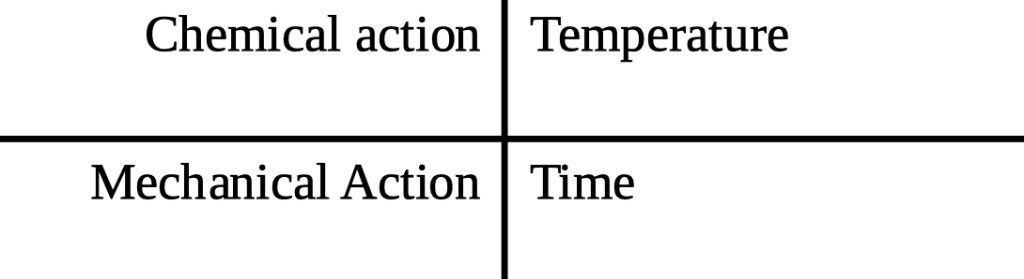
Different places where I have worked have had different protocols for the cleaning, but be aware that caustic cleaning is most effective at 50-80 C, needs to be recirculated for 15-20 min and should impact on your surfaces at > 1 m/s to guarantee turbulent flow. Why is there an upper limit you may wonder? That is to avoid baking your solids onto the heated surfaces. Here it’s worth mentioning the Sinner diagram:
You need all these factors to clean equipment, and if you reduce one (say chemical strength) you will need to increase one or more of the others (time, temperature or mechanical action). Once your vessel is free of soil you need to flush the caustic out as you definitely don’t want caustic in your beer. Simple phenolphthalein test papers work well to check the flush water.
With the base of your mash tun (below the plates) it is likely that you’ll not be able to use a spray ball system so you are probably looking at more mechanical action. Jumping into the vessel with a bucket and scourer or using a pressure washer! However this will probably only be necessary 2-4 times a year. This is a vessel entry, so again follow your local risk assessment. Actions should include, locking off any mechanical, chemical or heat inputs that you have and ventilating well.
Often a cold caustic cycle is all that is needed on the fermenter.
Cleaning fermenters – a cautionary tale
After you have transferred the beer from your fermenter there will be a high level of carbon dioxide with it. If you don’t already know, be aware that carbon dioxide reacts with caustic:
CO2(g)+ 2 NaOH(aq) → Na2CO3(aq) + H2O(l)
All of your CO2 gas will become a dissolved solid, result – a big drop in pressure. It is readily possible to collapse an FV because of the vacuum formed. The safe approach to manage this issue will depend on the size of the fermenter. Massive lager FV’s would need an air purge and CO2 monitoring. Smaller vessels can be managed by three x 10 second water sprays and leaving an inlet open during the initial caustic circulation. This worked fine on 5000 L FV’s with a 1 ½” being left open (and a short hose running to the drain). I have seen people leave the manways cracked open but this is dangerous in its own right as you’ll get hot caustic splashing into the work space – no thank you!
Inorganic soiling
In a small brewery you are most likely to see this in your hot liquor tank or in your casks. Here the aim is to solubilise the Ca / Mg salts with a suitable acid. The preferred option being phosphoric acid or a phosphoric / nitric mixture (NiPac B). This should be used at 1-4% and cold or warm, never above 50 C or it will fume. Again you’ll need a good water flush (see below) afterwards and this time litmus paper to check.
Biofilms
A less frequent task. If these are to be removed with CIP you would use your normal caustic solution (1-3%) but add to it some hydrogen peroxide (0.1-0.2%). However these often tend to build up in pipes where the flow rate is slow – such as the drain lines from your mash / lauter tun. Here the answer is mechanical effort! Sadly Murphy’s don’t sell elbow grease… I’ve had great success with a technique I used in the chemical industry called pigging. This is where an abrasive coated foam ‘pig’ is pushed down a line with air or liquid pressure. In the brew house a lower tech solution is required. Tie a foam scouring pad to a rope and pull through your lines until visual inspection shows them to be clean. The beauty, if there is one, with biofilm is that you can easily see it.
Sanitisation
Here there are a number of options, but a really good one is dilute peracetic acid. If used at 100-200 ppm it is not only an effective bactericide but will not need to be rinsed out of the vessel, simply drained. Another tip I learned is that most people can smell a dilute peracetic acid solution when it is above 75 ppm. So if you cannot smell it, either you have COVID or your solution is now too weak. Peracetic acid is another chemical you can buy readily from your local agricultural agent but again is something to be treated with respect as a concentrate and in accordance with your local risk assessment.
Flushing
Flush before you wash – that way the bulk of the soiling will be washed out and the potency of your cleaning chemicals will be preserved for multiple cycles.
Flush after you wash – Here you can work smart and save both time and water. Three ten second flushes will be a lot more effective than one 1-2 minute continuous spray down. The reason is all down to dilution (diluting by 90% three times (99.9%) is much better than diluting by 98% once). The pooling of liquor at the bottom of the vessel.
Need more advice?
If you buy your cleaning chemicals from a large supplier they are normally very happy to come and answer any of your questions. If you are a micro-brewery and this is not an option for you then contact me and I can help. Having worked in the chemical industry before I started brewing means I have a sound background in chemical safety and vessel cleaning methods.
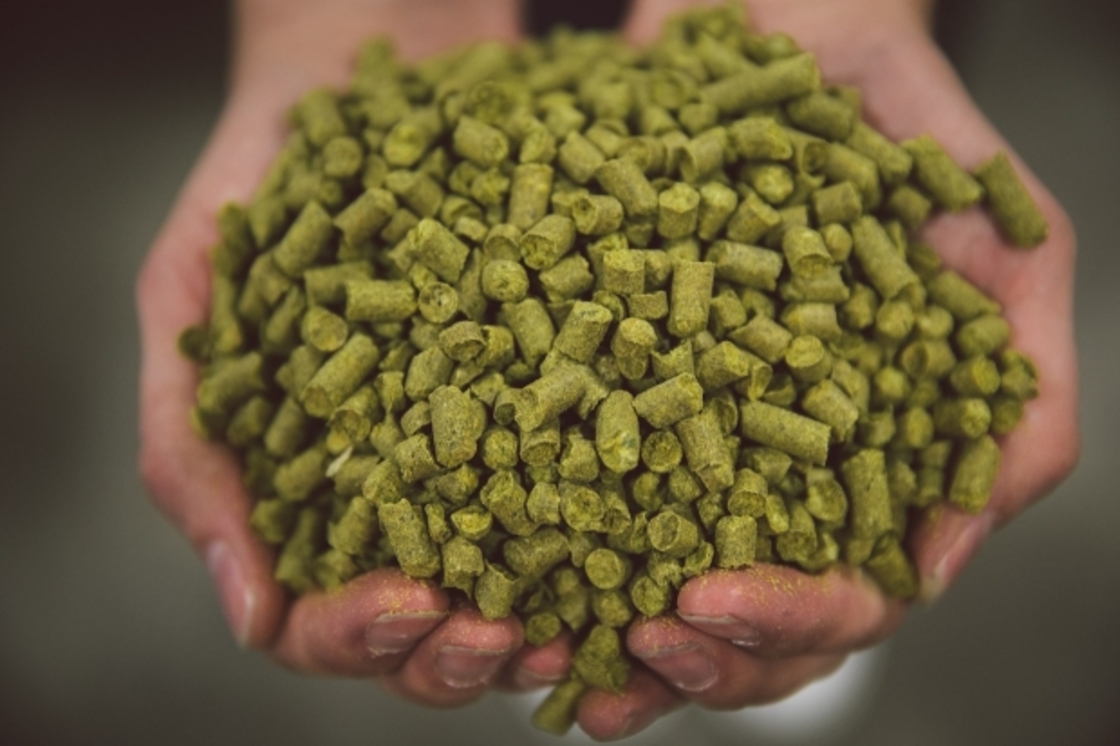
My last post on hop addition timing attracted a lot of interest and someone from Yakima Chief reached out to me with a technical data-sheet which they published in 2021. I’ve shown the key chart below which quantifies the nature and level of hop flavour oils which they have detected in a finished beer vs. species and addition time.
They don’t specify their methodology but compare a set of hop species whose oil content has the combination of concentration and properties (solubility, boiling point etc) which helps them to remain in the beer from the hot side and those whose qualities mean they are best added as a dry hop.
Species
Flavour / Comment*
2-Nonanone
Cheesy / Herbal
Geraniol
Floral
Linalool
Citrus / Fruity
2-Methylbutyl isobutyrate
Fruity / Apricot
Methyl Geranate
Floral
Isoamyl isobutyrate
Apricot / Banana
3-Mercaptohexanol
Tropical / Grapefruit
* A flavour combination is often different from the sum of it’s parts.
Information of hop oil composition is hard to find, so whilst the chart is only qualitative and only covers US varieties it does give a good guide to a range of 20 popular aroma hops. I know that one use I will be able to put this to is to combine hops with different oil profiles to better maximise the breadth of flavour experience in my beers.
A copy of the full data-sheet can be downloaded from here or here. If you are a micro-brewery wanting help with a beer design, please do get in touch and let’s see how I might help.
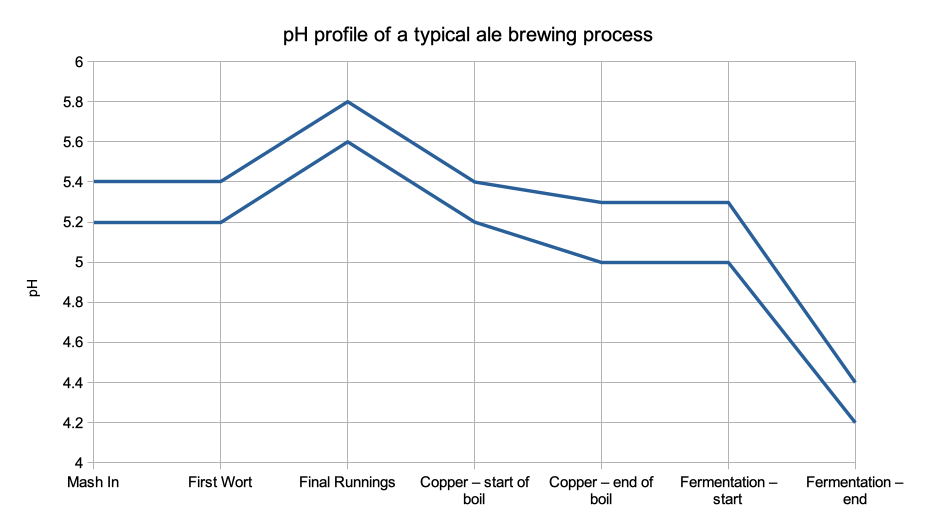
All through the brewing process, having your mash liquor, wort and proto-beer within the desired pH window is critical to both quality and yield. When we are mashing or fermenting we are relying on enzymes which work best within a tight pH window. During boiling it is chemistry rather than biochemistry which is at play, but still pH is critical to the final beer quality.
The chart below shows the ideal pH window as it tracks through the whole brewing process.
Mashing
During the mash we want the α and β amylases to work as effectively as possible and that means that the mash should be between pH 5.2 and 5.4. This is controlled primarily by your water chemistry which I covered in an earlier post. If your pH is too low your starch conversion efficiency will drop, if it’s too high you’ll start to extract tannins and silicates which you want to leave behind in the spent grain. If you are running a new recipe it’s wise to check this pH on the first couple of runs to make sure it within range. This is doubly important with darker beers, where the roasted malts can have a big impact on the pH. There are ways to estimate this, but they are only estimates and it’s best to check what you’ve achieved and adjust your calcium or bicarb addition levels on porters and stouts. After that it’s good to check your run off pH once a week / fortnight to check nothing has drifted.
That astringency that you taste in some stouts, it shouldn’t be there! That is someone not properly attending to their mash pH.
Mashing is the stage where pH is most critical, if you get inside the correct window here then it should track within the desired window for the rest of the process for beers above 3.0% ABV.
Sparging
Here you should be using either pH or SG to monitor your last runnings so as not to go too far. That last portion of weak worts doesn’t contain a whole lot of sugar but will contain undesirable levels of polyphenols or lipids if you let the pH go above 5.8 or SG below 1.006. Remember you are sparging with water which will be pH 7 or slightly above, so the pH of the run off will start to rise from the middle of the sparge onwards
Boiling
There’s a lot that goes on in the boil. The pH will impact the colour development, hop α-acid isomerisation and protein drop out (thus final haze stability). Different pH’s are ideal for each, so the key here is consistency. The pH drops during the boil due to the acid end products of the Maillard reaction and more Ca phosphate precipitation. If necessary you can add a little phosphoric or lactic acid during the boil if the pH is outside of your normal range. However if you have got your mash pH correct and not over-sparged you shouldn’t have an issue. If you are making a low alcohol beer you are likely to need to add a little acid to drop the pH into range.
Fermentation
Again we are trying to keep the enzymes happy and so long as we’ve done everything right up to this point all should be well. Yeast produces acids as a by-product of cell growth and also as one of it’s sugar transport mechanisms. One key thing to remember is to drop the yeast, or transfer the beer off the yeast in a timely fashion or you’ll see your pH rise, reducing shelf life as well as adding undesired ‘beefy’ flavours to your beer. If you are making a low alcohol beer again extra care should be taken and the pH adjusted if necessary.
pH measurement
After spending 20 years in the chemical industry I know more than a little about temperamental pH meters. If you are going to buy a pH meter don’t skimp on price or pick the cheapest one you can find on Amazon. These will never be as accurate or repeatable as you’ll need for brewing. Something from Myron or a bench based model from Jenway would be good options. If you cannot spend £250 then your better option would be to get some narrow range pH test sticks (try these or these). These may not be as precise but if you want something inexpensive yet accurate they are your very best option. You can know for sure if you are sitting inside your desired range or when to stop your sparge. They are quick too.
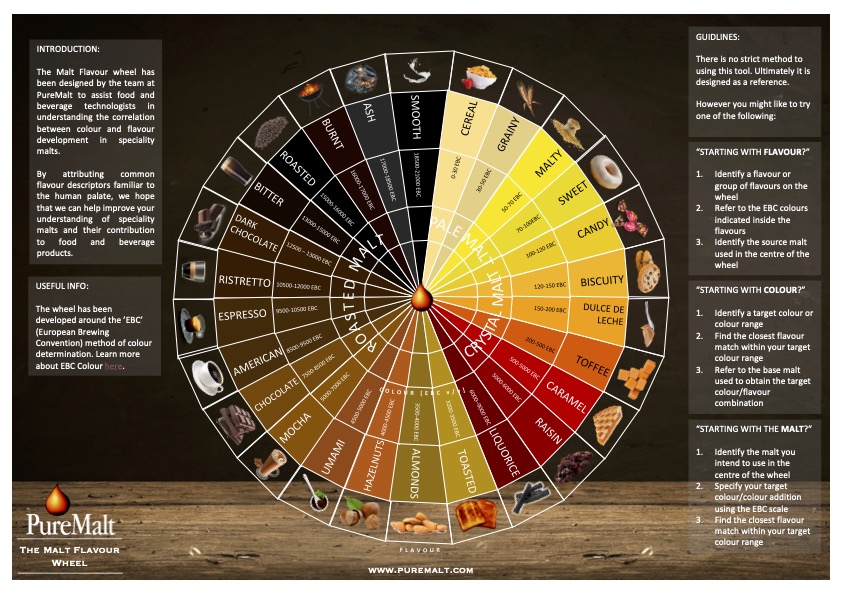
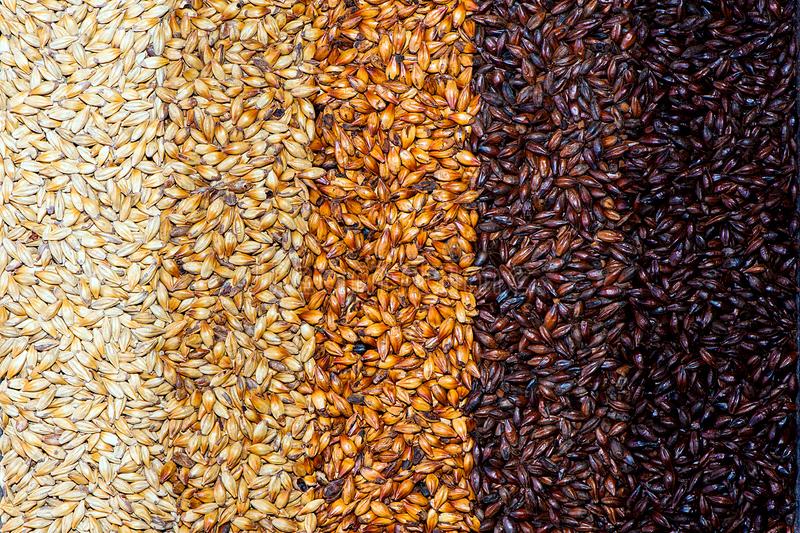
The current craft beer scene has it’s focus on hops, these are the celebrities of today’s beer. But behind every great hop there has to be a great malt base!
A great beer is more than just aroma. The first thing that a customer assesses about a beer is it’s appearance and that is shaped by the malt bill. Whether you are looking for clarity or murky haziness, a brim full glass or a deep long lasting head these aspects come from the malt (and/or adjuncts) which form the grist. The range of malts available to us today is a veritable kaleidoscope
There is such a breadth of flavour options there, but the topic for this post are the less obvious characteristics which we can use to impact the more subtle but equally important aspects of our beer design.
Clarity or Haze…
The current trend in the UK is for hazy IPA’s. Permanent haze in beer comes mainly from protein-polyphenol complexes or beta-glucan and related polysaccharides. But you need the right protein, not just any protein. Here you should be looking at malted wheat. Torrified wheat has a high haze potential, but being ‘less-modified’ the protein fraction is of a larger molecular weight which tends to drop out with time. To further aid the haze and to give that ‘pillowy softness’ then use some malted oats which contribute beta-glucan / polysaccharides to achieve these effects. Don’t go crazy with the amount you use however as the lack of husk on the wheat or the beta-glucans in the oats could make for a very slow run off from your mash tun.
What if your aim is a beer of the ultimate clarity? This is probably best achieved by good water chemistry, careful optimisation of your boil time, kettle and auxiliary finings. But if you are working at the micro scale then finings optimisation trials are not always an easy option. Did you know that the major source of the polyphenols behind haze is the base malt, not the hops? Crisp offer a malt which they call ‘Clear Choice’ which is malted from a unique variety of barley which is free from the class of polyphenols which help form haze complexes. For an easy option at the small scale this could be something to consider.
Body
One of my earlier posts covers the various ways you can control the body of your beer. There’s no point repeating all that here just head to my post on bodybuilding. Suffice it to say that wheat and oats are again good choices, and if you are making a Stout consider some Munich malt which adds both body and some lovely complexity to the malt base.
Colour
Clearly the range of differently roasted malts offer a full palate of colour options for your beer. But what if you want to add the colour without the flavour? Here I’m thinking about something like a Red Ale or a Black IPA. Here Black Malt is your friend, but don’t add it to the mash, spread it over the top of the mash bed just before you start sparging – in this way you get a lot of the colour and very little of the flavour extracted.
Another related trick is needed if you want to make a lager that looks and tastes like it has been made via the traditional decoction method, but when you don’t have the kit or the patience to use this approach. The boil stage of decoction promotes the Maillard reaction yielding melanoidins. A similar effect can be achieved used a small proportion (2%) of Melanoidin malt within your malt bill. Here the melanoidins have been formed during the roasting process
Finally, if you want to get the colour and flavour from a roasted malt without the astringency then consider some dehusked malt such as one of the Carafa Special grades from Weyermann or Blackprinz from Breiss. Many of the polyphenols in barley is within the husk, if it’s not there it cannot impart the astringency. Also important with a stout is to get your pH right by adding some bicarbonate to a Stout Grist to keep the pH up to around 5.4. Dark roasted malts, rich in acidic melanoidins will reduce the pH in the mash and reduce your extract efficiency unless you correct for this.
Sweetness
Crystal / Cara malts are made via a different process to regular malts. Rather than being drying directly after malting, they are heated to a comparable temperature in a sealed drum so that they are ‘stewed’ before drying and roasting. This starts the saccharification process and the sugars become caramelised during the drying / roasting stages. A whole range of colour options exist. The most crushable hoppy beers of today have a backdrop of subtle sweetness to bring out the best of the fruity flavours from the hop oils. Pale Cara malts (15-25 EBC) are used to achieve this. Hops might seem to win all the Oscars, but Cara malt should win a gong for the Best Supporting Role.
For malt forward beers where sweetness is also important, some of the darker Crystal malts come into their own. These give toffee (Crystal Pale / 150) or caramel and dried fruit (Dark Crystal / 400) flavours to both traditional and modern porters and stouts. What did you think put the popcorn into Northern Monkey’s Film Club?
In everything, moderation
Finally don’t forget the most important superpower of all, and that is the enzymic power within base malts which turns the starch into sugars – the source of our alcohol. Enzymes are delicate and high temperatures denature them. Both roasted and crystal malts no longer contain functional enzymes so have no diastatic power. Thus when using these malts never use more than 10% of each and always have at least 70% of base malt within the grist. The two exceptions here are Vienna and Munich malts which retain enough diastatic power to be used at up to 100% of the malt bill, so these can be counted towards your 70% too.
More help?
Would you like a beer recipe designed for you, and even made at pilot scale for you to try? I can offer both of these services and very soon I will have the AWRS licence required for you to test out your new brew on your own customers for their feedback because launching into a full scale batch. If either of these are of interest, just give me a call.
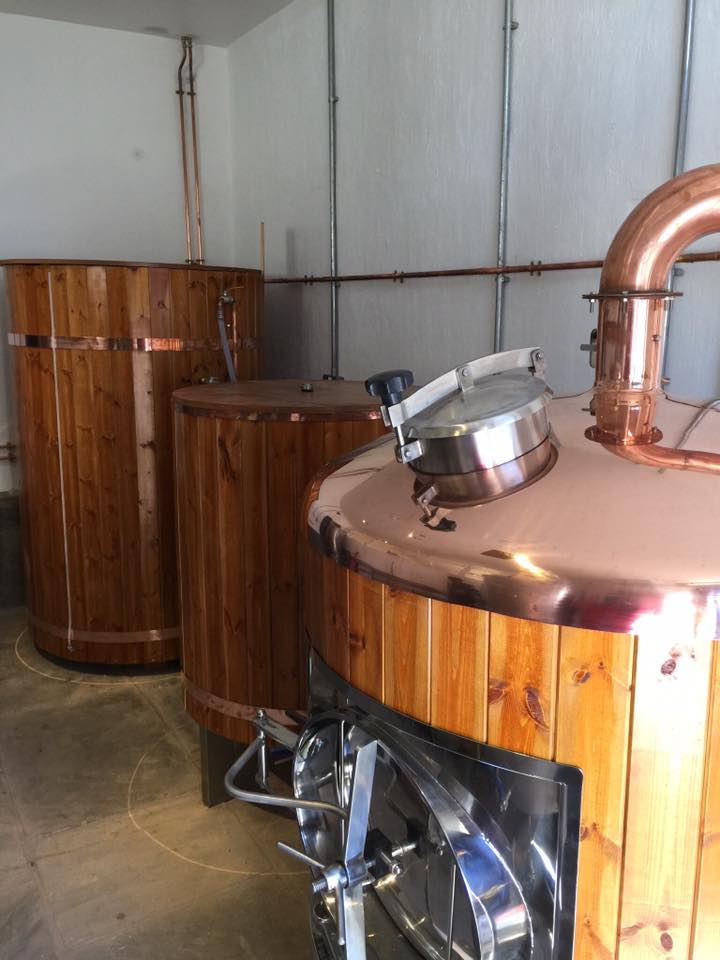
There is a rather nice rural pub near to me that I know has its own 4 BBL brew kit. A chat with the GM in the autumn revealed that the kit hadn’t been run for quite a while because of the lack of an available brewer. When I conceived the idea of becoming a freelance locum brewer and beer designer this is one of the people I contacted to find if they wanted me come a breath life back into their nano brewery. They did, any they were not the only potential client…
Roll on a few months and I’d had some really fruitful conversations with the landlord and he was keen for his in-house ale to be made once again, traditional flavours in a golden beer. As with all my contracts I like where possible to start with a couple of hours of familiarisation with the last person to have run the kit. Whilst the unit operations of making beer on any small brew kit are almost identical, the foibles of each kit are often unique.
Having learned during my familiarisation session that this brew kit had not been run since 2018, I proposed that I should spend time recommissioning it. It had been left good and clean, but the last thing you want on your brew day is to find a leak, a faulty heating element or a pump that doesn’t work. Those things might be impossible to fix ‘on the hoof’. In this case I found two pumps which had seized due to swollen pump case seals. At this point, I need to say thanks to Dave at PBC who talked me through a simple fix which worked a treat.
Next on the list was to check the recipe which had been presented to me. There are a few design calculations that need to be correct for a beer to come out as you hope. As much fun as it is having a happy accident, getting the raw materials levels wrong on a brew is more likely to lead to something bland or unpleasant that a paradigm shift in craft beer design! All was good, so I recommended some suppliers and helped the landlord with the raw material order. That was a Friday, the following Thursday was brew day.
As the eagle eyed will have spotted the brew kit was a PBC / “Dave Porter” kit. Whilst their entry level kits are rather basic, I’ve been extremely pleased with the performance which I have coaxed out of the two that which I now regularly operate. The level of control is limited when compared to the 30 BBL which I used to run at Bowland but with some forethought it’s not hard to get excellent and consistent results. One of my tricks is to mash-in ‘in three thirds’. This allows me to quickly and easily make any corrections to my calculated strike temperature and allows me to use a single HLT set point for both mashing and sparging. My mash temperatures are always within +/- 0.5 C of plan, a performance equal to the use of pre-masher on a much larger kit. Extraction yields have always been around 99% too, so nothing to complain about there either.
When it came to running off the wort I had a new toy to play with. This was a first time I’d seen a Valentine Arm in the flesh, but what a nice addition it was. The subtly by which I could adjust the flow rate of wort out into the under back was fabulous. It was so much better that the ubiquitous butterfly valve you find on almost all mash tun outlets.
Now I have wort coming up to the boil in the copper and it gives me a chance to pass on another tip for getting the best out of a small brew kit. As with any vessel you want to boil in, the working capacity is only ever around 80% of the total capacity. However, even with this precaution in place it is so much easier to boil-over a 500 L rather than a 5000 L copper. But one thing you can do is to take advantage of a little discussed feature of hops, that the lipids within them act as a natural anti-foam. Even if your beer design is aiming to add most of the hops at flameout, if you add just 5% of the bittering potential up front you can greatly minimise the foam formed by the initial protein precipitation of the boil making it easier to control the initial boil at a maximised capacity.
The rest of the day proceeded to plan and by the next morning there was pleasing krausen on top of the fermenter so I just needed to leave the yeast to do its job. In my experience, fermentation is slower in flat bottomed FV’s than cylindroconicals. Given that dry hop extraction is also better in the latter, I can only assume this is down to better mixing.
Five days later we were at 1010 and it was time for a diacetyl test. I find any beers which contain chocolate malt or Crystal 150 need a diacetyl rest and this beer was no different. Another two days and all was well and it was time to charge the auxiliary finings and cool. That brought me to the weekend, so I racked out on the Monday. And a week after that, my client was able to serve his own ‘in house’ beer after a gap of four years. Depending on how quickly it sells I can see there is scope to increase the batch size next time, but clearly this needs to be a good match for what can be sold over the eight weeks post racking. More exciting still is their enthusiasm for me to work with them on a new beer design, something pale and tasty for the summer months.
What a satisfying fortnight that was. It is always great to be able to work in an enthusiasm small team and to know that I can make a significant contribution to projects such as this, bringing a breadth of brewing experience, process plant understanding and IBD technical knowledge to bear. That’s why I love micro-brewing. Do you want to install a brew kit into your pub but don’t know how you would staff something that isn’t planned to run every week of the month? Would you like someone to check over a beer design or help you with your water chemistry? Just give me a call and let’s explore how I might help.


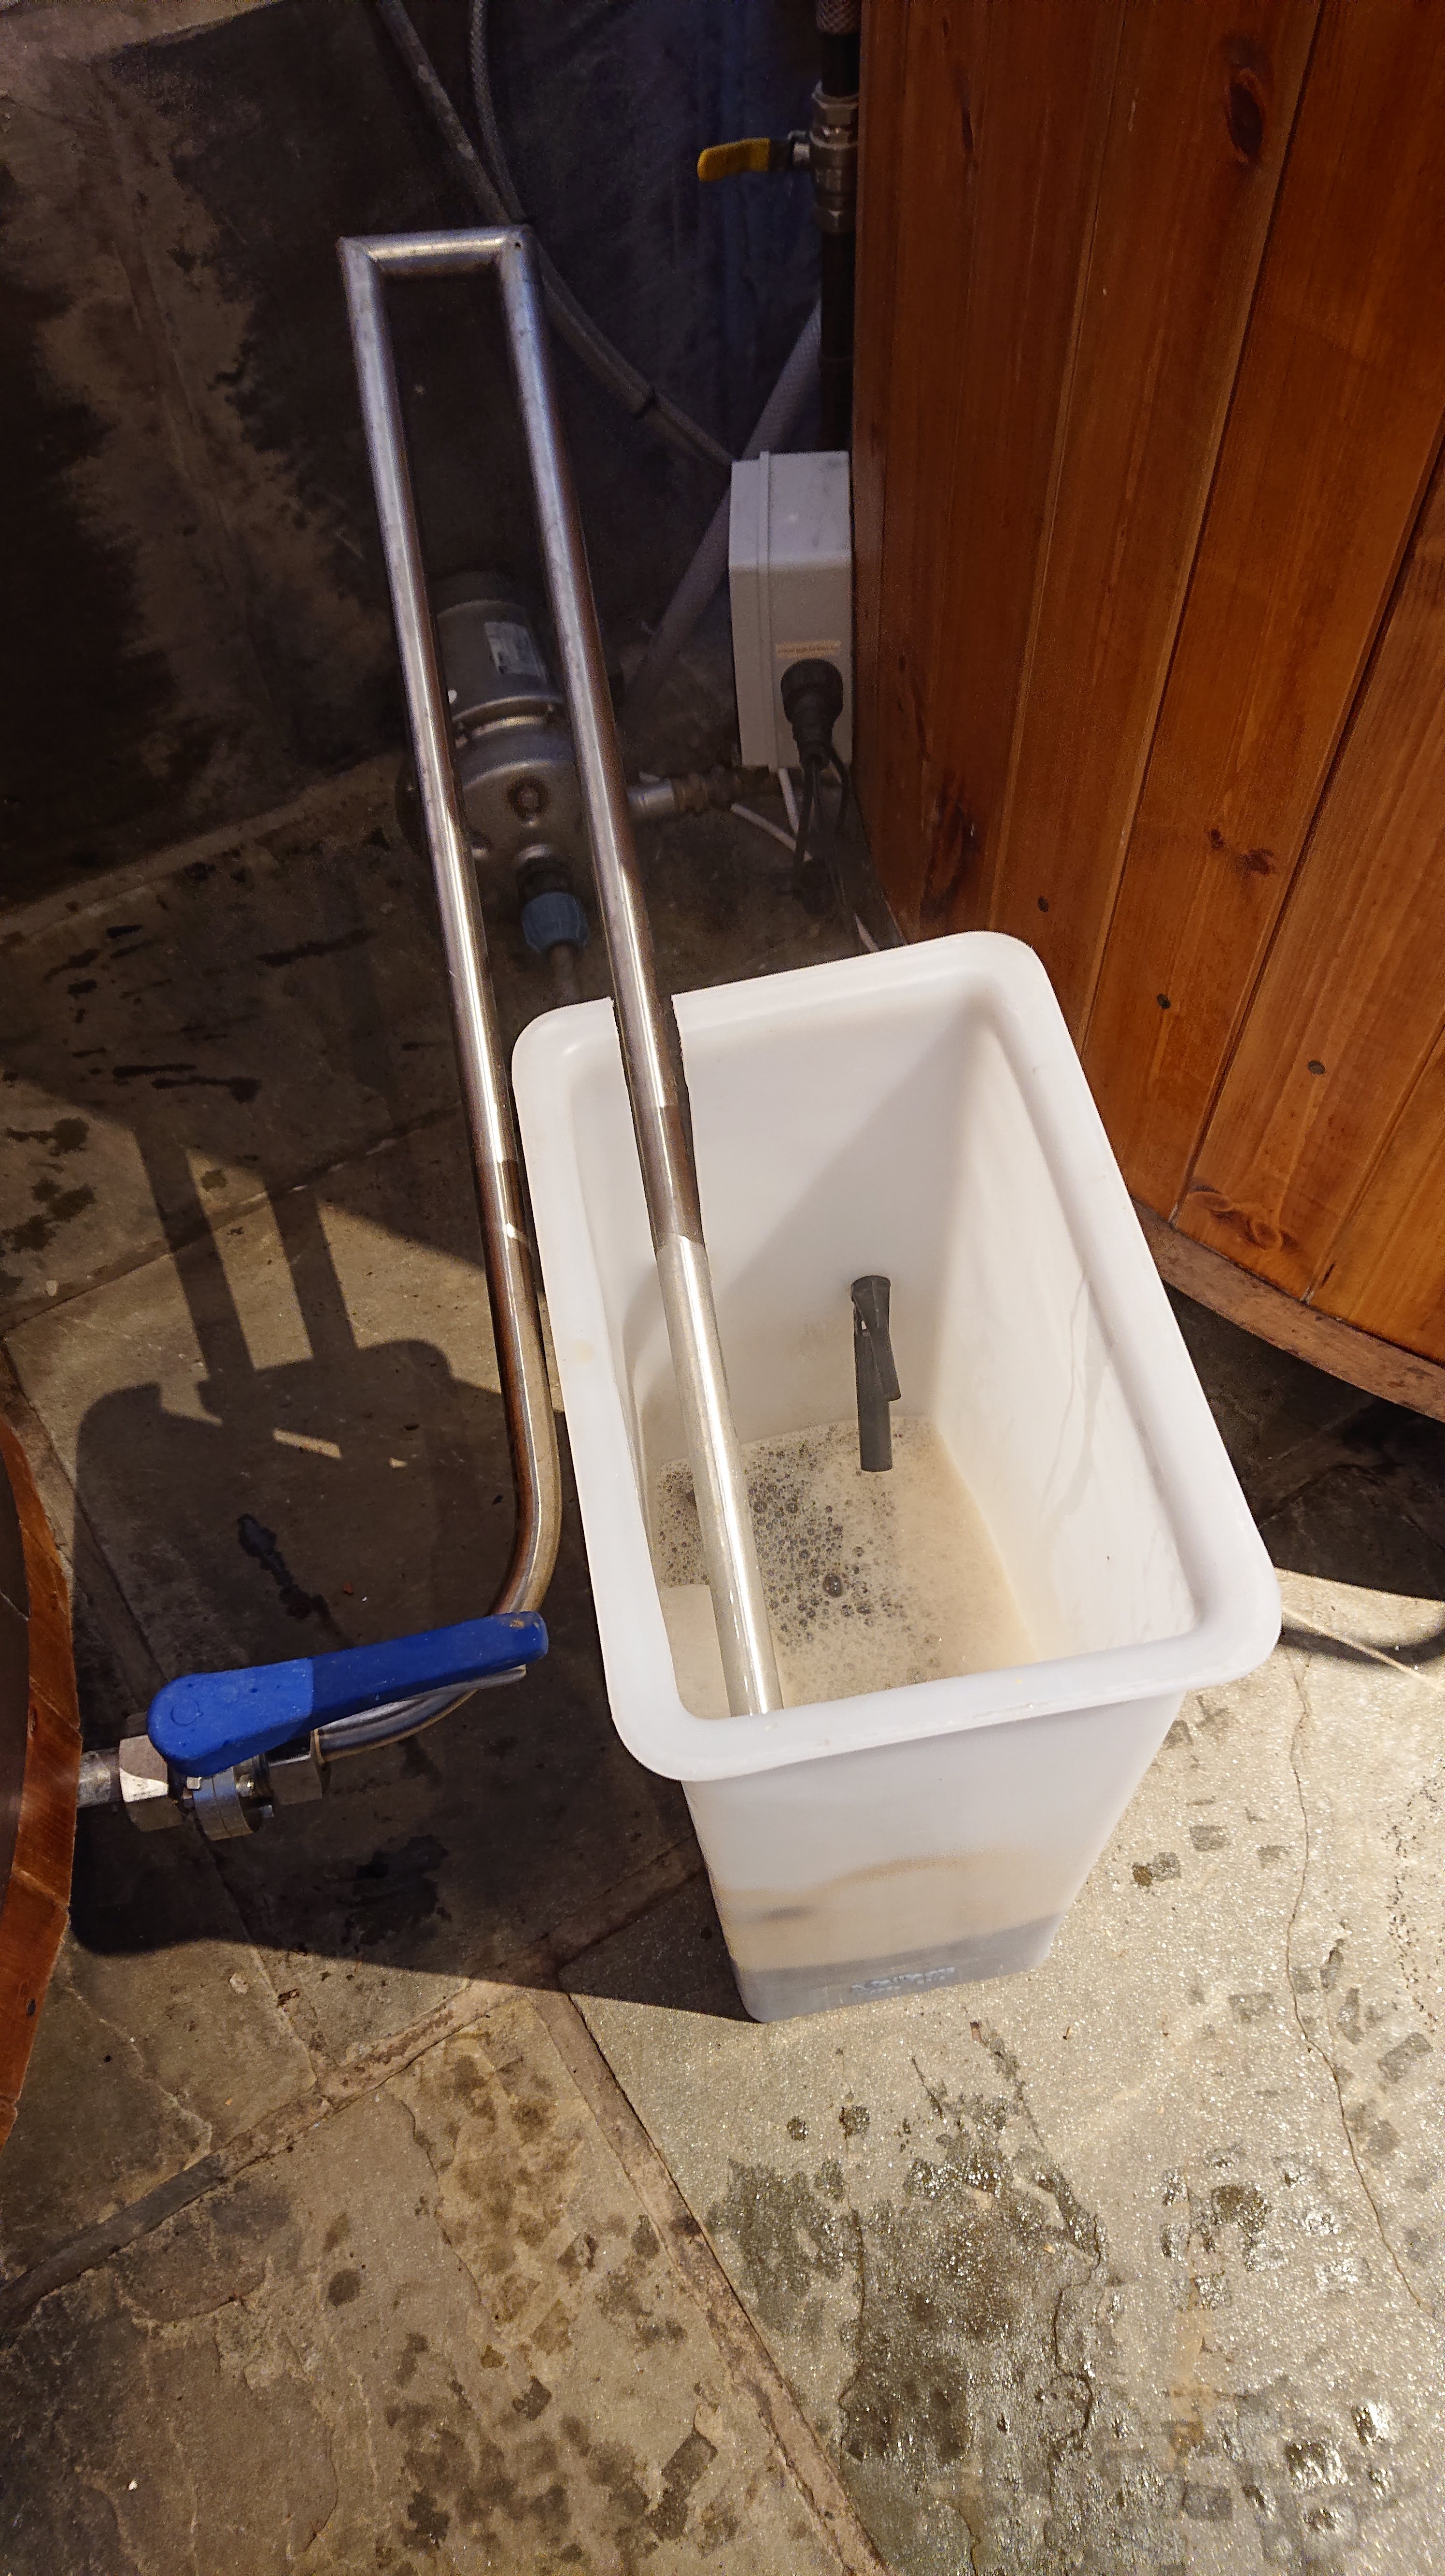 When it came to running off the wort I had a new toy to play with. This was a first time I’d seen a Valentine Arm in the flesh, but what a nice addition it was. The subtly by which I could adjust the flow rate of wort out into the under back was fabulous. It was so much better that the ubiquitous butterfly valve you find on almost all mash tun outlets.
 Five days later we were at 1010 and it was time for a